Creating Your Own Besom.
While you can easily buy a broom, making your own besom from natural materials is a deeply meaningful and empowering experience. This process connects you to the earth and the traditions of witchcraft, and it allows you to fill your tool with your own energy and intention from the start. Crafting a besom is a rewarding activity that anyone can do, whether you are new to witchcraft or have years of experience.
The following instructions describe how to make a traditional besom, but you can adjust the process to fit the materials you have or the traditions you wish to follow. The most important elements are your intention and the care you put into your work. Here is a clear list of what you will need:
Step 1: Choose a handle. Find a sturdy, straight branch about four feet long. Ash and oak are traditional choices because they are strong and have magical associations—ash for protection, oak for endurance and wisdom. However, you may use any wood that feels right to you or is available in your area. If you harvest fresh wood, thank the tree or plant, and always gather responsibly.
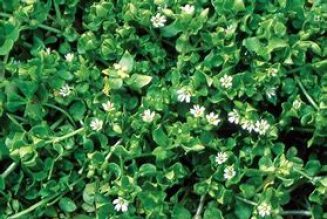
Step 2: Gather bristles. Collect thin, flexible birch twigs for the bristles. Birch is often used for its connection to purification and new beginnings. If birch is not available, you can use other woody herbs such as mugwort or thyme. Each herb brings its own magical qualities—mugwort for intuition, thyme for courage.
Step 3: Prepare binding material. You will need willow branches or a strong, natural cord to bind the bristles to the handle. Willow is preferred for its flexibility and its association with the moon and water magic, but any flexible binding will work. Also, have a pair of sharp scissors or garden shears, and a bucket of warm water ready.
Step 4: Soak the bristles and binding. Place the birch twigs or other bristles in warm water and let them soak overnight. This will soften them, making them easier to bend and work with. If you are using willow branches for binding, soak them as well to make them more flexible and prevent breakage.
Now, follow these steps to assemble your besom:
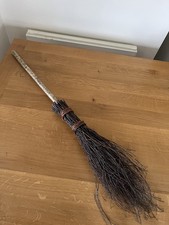
Step 5: Arrange the handle and bristles. Lay your handle flat on a sturdy surface, such as a table or the floor. Place the bristles alongside the handle, so the ends of the bristles extend about four inches past the bottom of the handle. This will form the sweeping part of your broom.
Step 6: Position the bristles. Point the bottom ends of the bristles toward the top of the broom. This may seem unusual, but you will fold them down later to create a neat, full sweep.
Step 7: Bind the bristles. Take your soaked willow branches or cord and wrap them tightly around the bristles and the handle. Bind the bristles securely in place. Work slowly and carefully, adding more bristles as needed to achieve the fullness you want. You can make your besom slim and elegant or bushy and rustic, depending on your preference.
Step 8: Secure the binding. When you are satisfied with the amount of bristles, tie off the binding with a strong knot. Double-knotting or weaving the cord back through itself will help keep the bristles in place. If you are using willow, twist the ends together firmly.
Step 9: Fold the bristles. Gently fold the bristles down over the binding so they point toward the bottom of the broom. This step creates the classic besom shape and covers the binding for a tidy finish.
Step 10: Add a second binding. Take another length of cord or willow and tie it around the base of the broomstick, just below where the bristles fold down. Pull it tight and secure it with a strong knot. This second binding holds everything in place and gives your besom its final form.
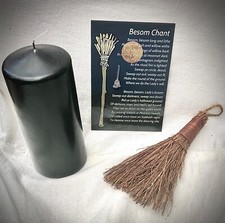
Step 11: Set your intention. As you wrap and tie, focus on your intention for this besom. Think about the energy you want to put into it—such as protection, cleansing, or celebration. You may speak your intention aloud or whisper a blessing as you work.
Step 12: Decide how you will use your besom. Will it be a decorative piece, hung above a doorway for protection? Will you use it in ritual to sweep away negative energy before casting a circle? Or will you use it for practical cleaning, blending magic with daily life? Your besom can be as unique as your own practice.
Step 13: Personalize your besom. Decorate the handle with carvings, paint, ribbons, or charms. Add dried flowers, crystals, or symbols that are meaningful to you. The more you personalize your besom, the more powerful it becomes as a magical tool.
Step 14: Let your besom dry. Once your besom is assembled, allow it to dry completely for one or two days in a safe, dry place. This will help the bindings set and ensure your broom is sturdy and long-lasting.
Step 15: Consecrate your besom. When your besom is dry, take time to consecrate it as a magical tool. You might pass it through incense smoke, sprinkle it with blessed water, or hold it under the full moon—choose the method that feels right for you. As you do this, reaffirm your intention and welcome your new besom into your practice.